Make sure you also check out the Teacher Tricks for Reading and Writing I just posted recently too – and I’ve mapped out a lot more fun posts coming your way! :) I have included some affiliate links (I get a commission for purchases made through the links) in this post so you can easily find some of the things I show. I don’t care whether or not you buy anything – feel free to just idea scavenge if you want :) I just wanted to make it easy for you to find them!

The first thing I want to share with you is adding magnets to the backs of math manipulatives. I love the magnets I have – you just peel the sticker off the back and stick them on anything to make it a magnet… LOVE!
Then you can use math manipulatives on the whiteboard when you’re teaching! You can do so many different counting, adding, subtracting, etc. activities with cubes on the whiteboard where kids can see visuals of your “thinking” as you move the cubes.

You really can put them on anything! If you’re teaching measurement with a ruler, put a few magnets on the ruler so it holds the ruler on the board in place as you hold things up to show kids how to measure items around the classroom. So much easier than trying to hold both!

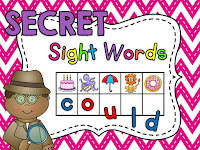
My favorite thing to use magnet-ed math manipulatives for is personal work trays! My dollar store has magnetic cookie sheets (for, yes, only a $1!) so I bought a bunch of them and they are PERFECT for so many things! I’ve shown you how I use them for word building with alphabet magnets in my Short A activities post but I also use them a lot for math.
Want to know another teacher trick? You can write on them with dry erase markers!!

I was so excited when I discovered I could write on them with dry erase markers and it wipes right off! It allows you to make so many different activities right on the board and change them as much as you want to which is great for small groups or even independent centers. You can also use wet erase markers if you find the kids are wiping off the directions themselves.

You can easily change this sort from sorting shapes by how many sides the shape has to sorting the shapes by their name (or any sort you want!) by simply wiping off what you wrote and rewriting :) This makes it so easy to transition between different small groups or between kids.

Also, since the cookie sheets are magnetic, kids can hold them in their lap to move around the pieces and have them stay in place. They can even hold them up and turn them around to show you their work without the pieces moving which is great.

Having the pieces stay in place is actually awesome for picture building with pattern blocks. No one is going to knock into their table and have the picture get messed up (cue the tears) and they’re not going to hit one block by accident that messes up the others, etc.
This is actually a great parenting trick as well if you have a younger kid on a long car ride – give them the cookie sheet and the pattern blocks with magnets on the back and let them make pictures in their lap while you drive. Pattern blocks are so much fun!

I have a lot more fun math ideas and games I showed that you can use with pattern blocks in my Composing Shapes post too!
Like I said, you can add magnets to the back of anything to make activities. You can add them to red/yellow counters and draw a 10 frame on the cookie sheet (or whiteboard) to do a ton of counting, adding, subtracting, etc. lessons!

You can also use pom poms of any size by just sticking a magnet to the back. An easy game you can play (shown below) is to have kids roll 2 dice that are different colors and put that many pom poms in their 10 frame to add the 2 together.

So as you can see, the pink dice says 4 so they put 4 pink balls into their 10 frame and the orange dice says 3 so they added 3 orange balls. Then you can ask them questions like, “What number did you make?” “How many more to 10?” “How do you know?” etc. for math discussion with you or their partner.
Speaking of dice, I LOVE my big fat chunky colorful dice. I love that they come in cute colors and also have the white one with extra sides that goes up to 12. It’s great for challenging the higher kids or to use later on in the year.

One math trick with dice that I love is to have kids roll the dice into a bucket! If they’re playing any sort of game or math center that involves dice, you can avoid having dice go flying across the room, off the table, etc. by having them roll into a bucket.

All you have to do is say that you lose your turn if your dice don’t land in the bucket and you won’t ever have dice on the floor again :)
It’s also a lot quieter than rolling on their desks or tables. You can even glue felt or foam to the bottom of the bucket if you want it to be even quieter. I have a few foam bottom buckets for quiet rolling and it’s wonderful.
Another way to keep dice off the floor is to use small containers just big enough to roll dice inside to make little shakers. You do have to use regular sized dice for those. I bought a pack of the small containers and made sets of them to throw in center buckets. Kids just shake them to roll their numbers. It’s so nice because you always know where the dice are, they don’t end up on the floor, and kids just grab them to use really easily when they need dice.

If you’ve read my math posts, you know I use dice a lot for hands on math games so it’s nice to have a system for them. Another thing you’ll know from reading my math posts is that I use my number cards from Unit 1 (or you can also get them in Unit 11) for a ton of different things. I mentioned in my Building Number Sense post how I even use them for behavior management too so I wanted to explain that a little more!

So this shows 50 but I usually start with 20 cards for the first time so it’s a quicker reward and also to solidify numbers 1-20. So, first, pick a reward that the class can earn that they’re really excited about (my favorite is an extra recess with popsicles) and have all the number cards showing in your pocket chart. Also print a second set of number cards, mix them up, and stack them upside down near the chart.
When the class gets a compliment for walking nicely in the hallway or the P.E. teacher says they were really good, whatever, tell them they’ll get to pick a number when you get back in class... OR during class, let’s say a group is working so quietly and well together during centers, say something like, “Wow, the blue table is working so hard and are so quiet right now – Aiden, you can go pick a number card.” He’d go up to the stack of number cards by the chart and pick a card. He’d show it to you then you’d flip that number over. When they flip all the number cards over, they get the reward! You could also have them earn mini rewards for completing a row or column.

Once they get the awesome reward, they’ll want it again so you can do the number chart up to 50 this time! I recommend doing it up to 50 a few times. It’s great because it really gets them looking at the numbers and talking about them (“We only need to get 42 and 45 to finish that row!”). You can also incorporate learning by pointing to a flipped over number and asking them what it is. They’ll have to look at the numbers before/after/above/below/etc. to figure it out so it’s great number sense practice. You can also ask them what number they need to finish a row, count by 5s, etc. Even just have them turn to a partner and ask each other questions about it. You can get a lot of great math talk out of it!
If you have one of those awesome pocket charts that is specifically for displaying the 100 chart, you can also use that and just have as many numbers as you want to practice in it.
More fun things you can do is have them get something for finishing a row or column like I said above. Maybe they get a small reward for getting 10 in a row (when you’re using the 100 chart) like half an hour of free choice centers or something fun like that.
I have a lot more fun classroom management tips in my Chatty Class Classroom Management post and 20 Classroom Management Strategies You Can Start Right Away post if you want more behavior management ideas!
I use the number cards for centers all year. Another way I use them goes along with the next trick of sticking magnets to the back of base ten blocks to practice place value. I got a big set of plastic base ten blocks that I use – I think it’d work to stick magnets on the foam ones too but I’m not sure. I used to use foam ones but I like the durability of the plastic ones so that’s what these are.

You can just give a kid a stack of number cards and have them build each number on their cookie sheet with base 10 blocks. It’s great for building numbers and practicing tens and ones.
You could also do this on a magnetic whiteboard. A lot of the small whiteboards aren’t magnetic but your big classroom board or easel most likely is so you can use those to practice whole group. :)

I also use the same materials to play War. Just like the classic card game but with numbers 1-120 instead! If your kids aren’t ready for that big of numbers, just use number cards 1-50 or 1-100 or whatever you think they can handle.

The trick is to have them build their numbers with base 10 blocks to compare. Even if they say they know the answer, building it is great practice and really helps them see numbers conceptually as this many tens, this many ones, etc. which is amazing for building their number sense.
Another place value trick is to use a permanent (or wet erase) marker to write 1-10 on a ten block so kids can see what the 10 actually means and that each cube within the 10 is a 1. It’s a really great visual for students to see the “why” behind the vocabulary!

Definitely read my Place Value in First Grade post if you want more fun place value ideas and to see the resources from my place value unit in action!
It also has tips for how to differentiate your place value lessons. Differentiating is really important to me – not just for your struggling students but for your advanced students as well like I talked about in my How to Keep Gifted Kids Engaged and Learning post. One easy way to differentiate is to use the different levels of worksheets (or centers) in my math units. The majority of the worksheets in my math units come in 3 levels for each concept – each one has a star in the upper right corner that says the level (A, B, or C) so you can easily give students the level that challenges but doesn’t frustrate them so they’re all working on the same thing but at their level. Another thing the worksheets also have is a self-reflection at the bottom where the student evaluates how they felt about the activity – was it too easy? Just right? Too hard? After they complete the worksheet, they circle at the bottom like this:

See how they circled “Just Right” at the bottom of this page? This section lets you know how the activity was for them. They do this after they’re done with the activity. It only takes a bit of time to train them to assess their own understanding correctly. If you notice the little strip they clipped underneath, I have those in full page posters that I go over what each level means in easy to understand kid language (the posters are just bigger versions of the desk strips) so they can reference it.

I also shrunk the posters down into these little strips kids can keep on their desk and clip how they feel WHILE they work so you can walk around and see how everyone feels about the worksheet you’re doing so easily – I love it. If you see they’ve clipped that it’s too hard, you can stop to help them; if you see they’ve clipped that it’s too easy, you could give them the next level up version of the worksheet to work on instead. Then, you don't have several hands up waiting for you for help - they can keep working and trying until you get to them. They can keep it on their name tag so it's not in the way and you can use them with any subject/activity to always be able to do a quick check for understanding.
Instead of clipping, you can also cut the strips into 3 mini cards to put on a binder ring so they can flip to which one they feel like this:

The full page posters and desk strips are all in my Assessing Understanding pack if you want to use these in your own classroom. They’re really great for assessing understanding during lessons and also having students reflect on their own learning.
I also sort the papers kids turn in by what they circled. It’s quick to just sort them into 3 stacks by what they circled. If they circled “Too Hard,” I usually will take that stack out and put it at the small groups table so I know to re-teach that to them in a small group or go over it with them when they have a moment. I also often put it in their Student Drawer (which I have a blog post planned to show you my individual student drawers) so I know to help them with it later if it’s just 1 or 2 kids :)
Sorting into 3 piles can also help you make flexible math groups super easily. I don’t like math small groups staying the same for every concept because sometimes a high kid struggles with telling time and a low kid excels with fractions so you want to be flexible in your grouping when you can so everyone gets what they need for each skill. After I sort the papers into 3 piles, you’ll usually find it’s mostly “Just Right” to make 2 or 3 small groups with that you can continue on at grade level with the concept, a handful of “Too Hard” to pull back to re-teach the concept and work on it in a more hands-on and visual way, and a handful of “Too Easy” to pull back to extend the lesson and provide more challenging questions/work with the concept. It’s like having an assessment for every single concept without doing any grading or testing – win win, right?! :)
You can also have them put the cards on a binder ring next to them while they’re doing centers so you can see how they feel about the center too, even if there isn’t a recording sheet or paper involved.

So if you were doing this simple color sort, if a student thought it was too easy, they would have the "Too Easy" card flipped showing. If they thought it was just right, they’d have that one flipped, etc. There’s a lot of sorts you can do with the cookie sheets like I said – you could change the one above to numbers instead of the color name and they put that many balls under it… or anything!
I hope you’ve enjoyed this list of math tricks! I’ve shown other math tricks on my other math posts in the past too if you want more! If you click on “Math” at the top of my site, it’ll take you to a list of links of math concepts I’ve written about so you can look at fun ideas to teach those concepts and such!
For example, in my Graphing and Data Analysis post, I show a trick for how you can use a fun daily graphing question to have your students take their own attendance each day AND sneak in a ton of learning.
In my Fact Fluency post, I show how you can take any cutting and pasting worksheet and turn it into a reusable center. That’s one of my favorite tricks for math and reading!
I haven’t written a complete post about using my math bottle cap centers yet but another trick is I love recycling bottle caps to use in math and literacy centers. Just write the numbers on the bottle caps and hand them the cards and they make really easy centers! I did show using bottle caps for phonics and word building in my CVC Bottle Cap Word Building post, though, if you want to see and bottle caps make appearances in some of my other posts too:)
Thank you so much for reading – I’d love to hear from you in the comments! Happy Teaching!!